
Belt Tensioner
This section describes how to use the SIMRIG SBM belt tensioner with SIMRIG Control Center.
The SIMRIG SBM tightens and loosens the shoulder straps of your harness while you drive. You feel braking, acceleration, cornering, bumps, and gear shifts through the harness. Each shoulder strap has 150 mm of travel and pulls with up to 30 kg.
In SIMRIG Control Center the SBM is called Belt Tensioner.
Getting started
Connect the SBM to your PC and make sure it is powered
Open the Devices page. The belt tensioner shows up in the list of devices.
Get seated, buckle up, and run the Auto Calibration
Enable motion by pressing the Enable button
Start a supported game and drive
See the full quick start guide for more details.
The belt tensioner is enabled and disabled together with the motion system. There is only one Enable button.
Note
Run the calibration again after adjusting the seat or the harness, and when another driver takes your place.
Profile settings
The belt tensioner uses the same profiles as the motion system. Each profile has a Belt Tensioner tab next to the Motion System tab. The two tabs are shown side by side if the window is wide enough.
The Forces section above the tabs applies to both the motion system and the belt tensioner.
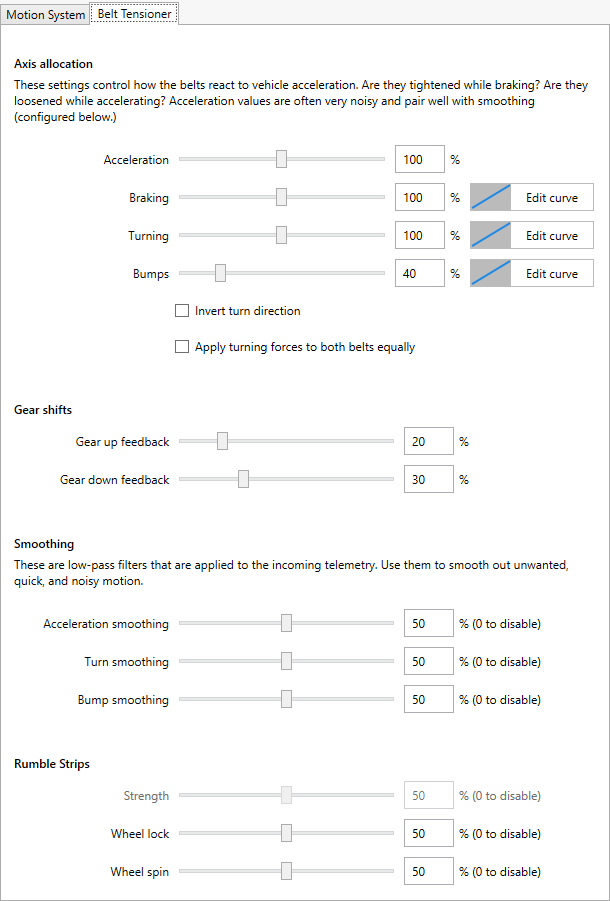
The Belt Tensioner tab of a profile.
If no belt tensioner has been connected, the Belt Tensioner tab begins with a short introduction to the product. Click the X in its top right corner to hide it.
Axis allocation
These settings control how the shoulder straps react to vehicle acceleration.
- Acceleration:
Controls how much the shoulder straps are loosened while accelerating.
- Braking:
Controls how much the shoulder straps are tightened while braking.
- Turning:
Controls how much the shoulder straps are tightened while turning.
- Bumps:
Controls how much the shoulder straps are tightened and loosened by bumps in the road.
- Invert turn direction:
By default one shoulder strap tightens more than the other in a turn. Check this box to pull on the other side instead.
- Apply turning forces to both belts equally:
Check this box to have both shoulder straps tighten equally in a turn, instead of one tightening more.
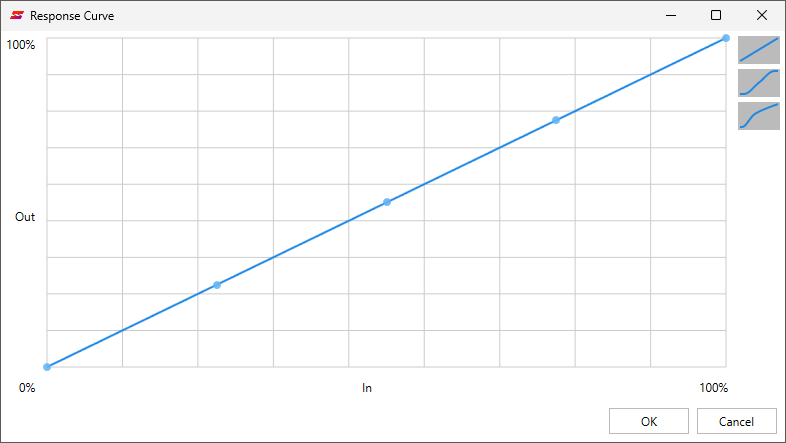
Braking, Turning, and Bumps each have a response curve. The response curve changes how the belt tensioner reacts to small and large forces. Click the button next to the slider to edit the curve. There are three presets to choose from:
A straight line. The force is passed on without modification.
An S-shaped curve. This adds a small dead-zone for small and for large forces.
A dead-zone for small forces. This makes the shoulder straps more stable while driving straight.
Gear shifts
- Gear up feedback:
Strength of the tug you feel in the harness when shifting up.
- Gear down feedback:
Strength of the tug you feel in the harness when shifting down.
These sliders are replaced by the message Not supported by game in games that do not report gear shifts.
Tip
Bind the Gear up button and Gear down button hotkeys to your shift paddles for quicker feedback.
Smoothing
Acceleration values from the game are often noisy. Use these sliders to smooth out unwanted, quick, and noisy motion. Increase a slider to make the shoulder straps react smoother.
- Acceleration smoothing:
Applies to acceleration and braking.
- Turn smoothing:
Applies to turning.
- Bump smoothing:
Applies to bumps.
Rumble strips
These settings add vibrations to the shoulder straps.
- Strength:
Amount of vibrations when driving over rumble strips.
- Wheel lock:
Amount of vibrations when the wheels lock while braking.
- Wheel spin:
Amount of vibrations when the wheels spin.
Each shoulder strap plays one of these vibrations at a time.
Pause the belt tensioner
Bind the Pause belt tensioner hotkey to turn the belt tensioner on and off while the motion system keeps running. The Pause motion system hotkey does the opposite.
The Motion status at the bottom of the window shows what is paused.
Tools and settings
The following tools and settings are located on the Devices page. Select the belt tensioner in the list of devices to show them.
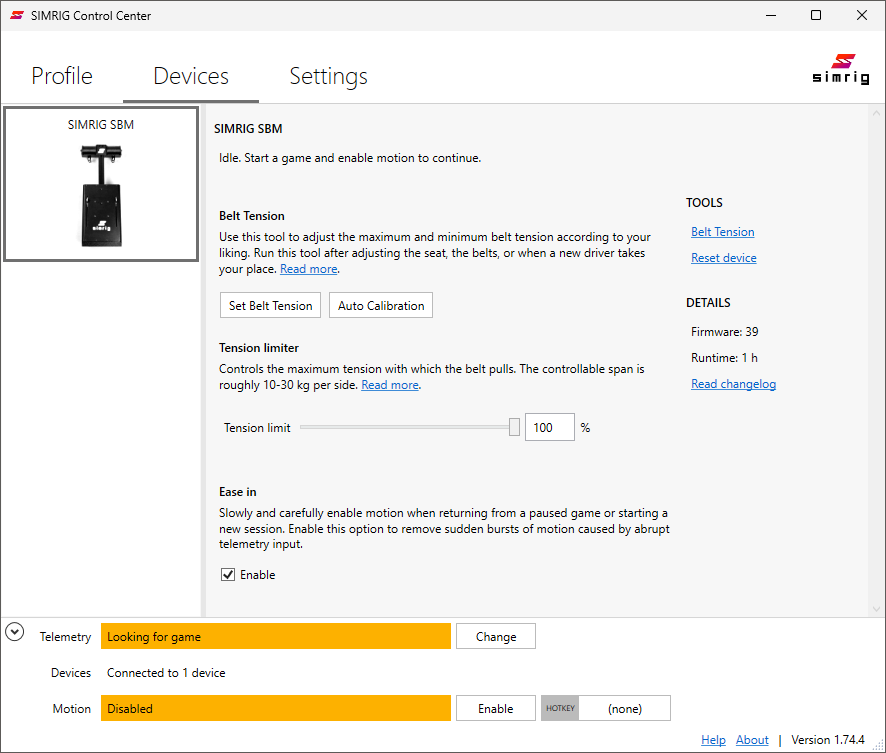
- Auto Calibration:
Sets the belt tension for you. This is the quickest way to get started. See Auto Calibration.
- Set Belt Tension:
Sets the belt tension by hand, one slider at a time. See Set Belt Tension.
- Tension limiter:
The hardest pull the belt tensioner is allowed. See Tension limiter.
- Ease in:
Slowly and carefully enables motion when returning from a paused game or starting a new session.
- Reset device:
Restarts the belt tensioner. Listed under Tools on the right.
Temperature warning
The message Temperature warning is shown on the Devices page when the belt tensioner is operating close to its temperature limit. The belt tensioner turns off automatically if the temperature keeps rising.
Let the belt tensioner cool down before you continue.
The warning stays visible until SIMRIG Control Center is restarted.